
In this tutorial, we’ll show you how to create a scheduled report in Not Just Analytics.
Why use scheduled reports?
Scheduled reports let you automate the creation and delivery of your reports at regular intervals, so you don’t have to generate them manually every time.
You can use them to:
- regularly track your profiles’ performance
- provide weekly or monthly updates to clients or collaborators
- save time by automating data collection
Let’s go through the steps to set up a scheduled report!
1️⃣ Access the report creation
- Log in to Not Just Analytics with your account.
- Go to the ‘Report’ section in the main menu.
- Click ‘Create Report’
Choose whether to:
- Start from an existing template (faster, with predefined charts)
- Create a report from scratch (if you want full customization)
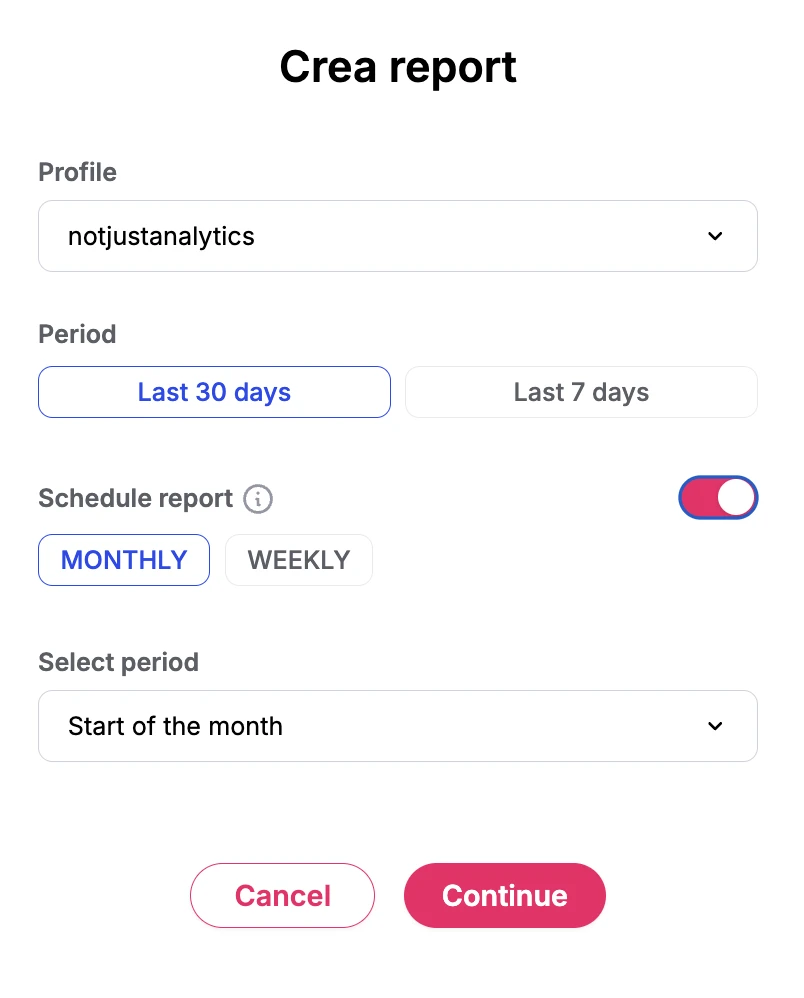
2️⃣ Enable the report scheduling
- Select the profile you want to schedule a report for.
- Activate ’Schedule report’ to set up automatic generation.
- Choose the frequency of the report:
- monthly: the report is sent at the start of each month, covering data from the previous month.
- weekly: pick a day of the week you’d like to receive the report (e.g., every Monday).
- Click ’Continue’ to confirm your settings.
📌Tip: set weekly reports for continuous monitoring and monthly reports for more in-depth analyses.
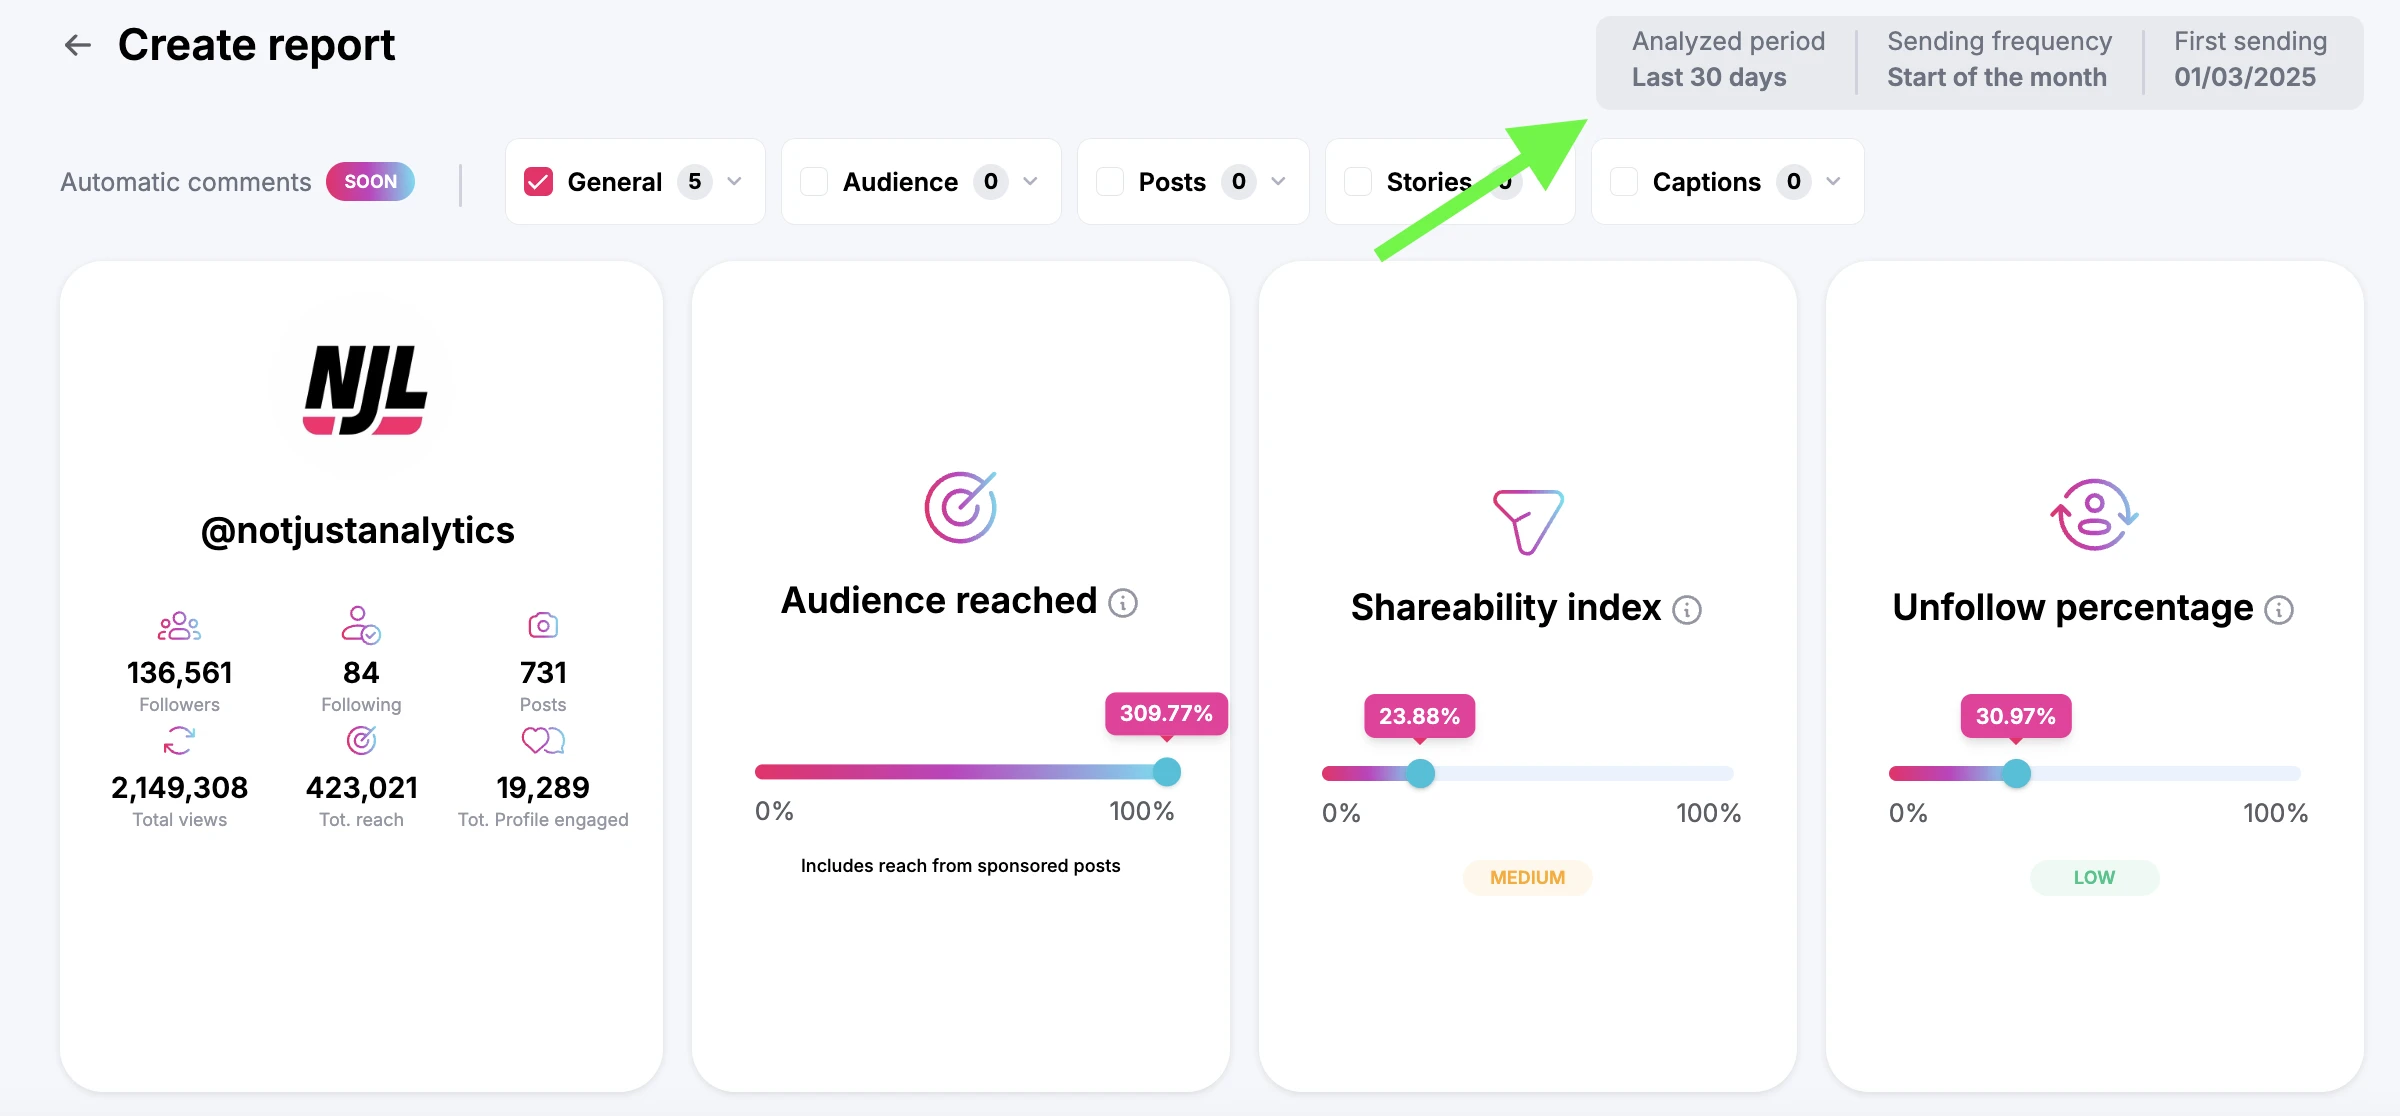
3️⃣ Select the charts
Decide which data you want in your report.
- If you chose a template, the charts will already be predefined. If you want to create a template, check our dedicated tutorial.
- If you want to customize the report, select the charts manually, choosing only those relevant to your goals.
- Click ’Next’ to proceed.
4️⃣ Define the delivery emails
After configuring the report, set who will receive it automatically.
Enter the necessary details for sending: i.e., the email address(es) of the recipient(s).
📌 Tip: if you work with multiple clients or teams, this feature lets you send reports automatically to the right people without manually forwarding them.
5️⃣ Review and finalize the scheduled report
Before finalizing, review your settings to ensure everything is correct:
✔ Report type: for example, weekly or monthly.
✔ Day of delivery: the chosen day for receiving the report.
✔ First delivery: the date when the first report will be generated and sent.
If everything looks good:
✅ click ’Schedule report’ to finish up.
📌 Note: once scheduled, the report will be generated and sent automatically, with no further manual action needed.
6️⃣ Managing scheduled reports
After scheduling a report, you can manage or edit it at any time in the ’Scheduled reports’ section.
Here, you can:
- Change the delivery day if you need a different frequency.
- Duplicate the report if you want to use it for another Instagram profile.
- Pause or reactivate the report temporarily if you don’t need it at the moment.
- Delete the schedule if you no longer want automatic reports.
📌 Tip: if you need to send the same report to multiple clients, you can duplicate it and only change the target profile.
Conclusion
With scheduled reports, you can automate data collection and delivery, saving time and ensuring constant performance monitoring.
✅ You can receive reports on a regular basis without generating them manually.
✅ You can customize the reports with the data that matters most to you or your clients.
✅ You maintain full control over managing scheduled reports.
If certain features aren’t available, they may depend on your subscription. Check out the plan features or contact our support team for more details.